
Job & Material Setup
Configure single-sided, double-sided, or rotary stock dimensions, units, XY datum, Z-zero reference, and wood species appearance.
Before drawing a single line, tell VibeCNC the exact dimensions and orientation of the stock you will clamp to your machine bed. Open the Setup tab in the far-left vertical rail (or choose File > Job Setup) at any time to review or update these settings.
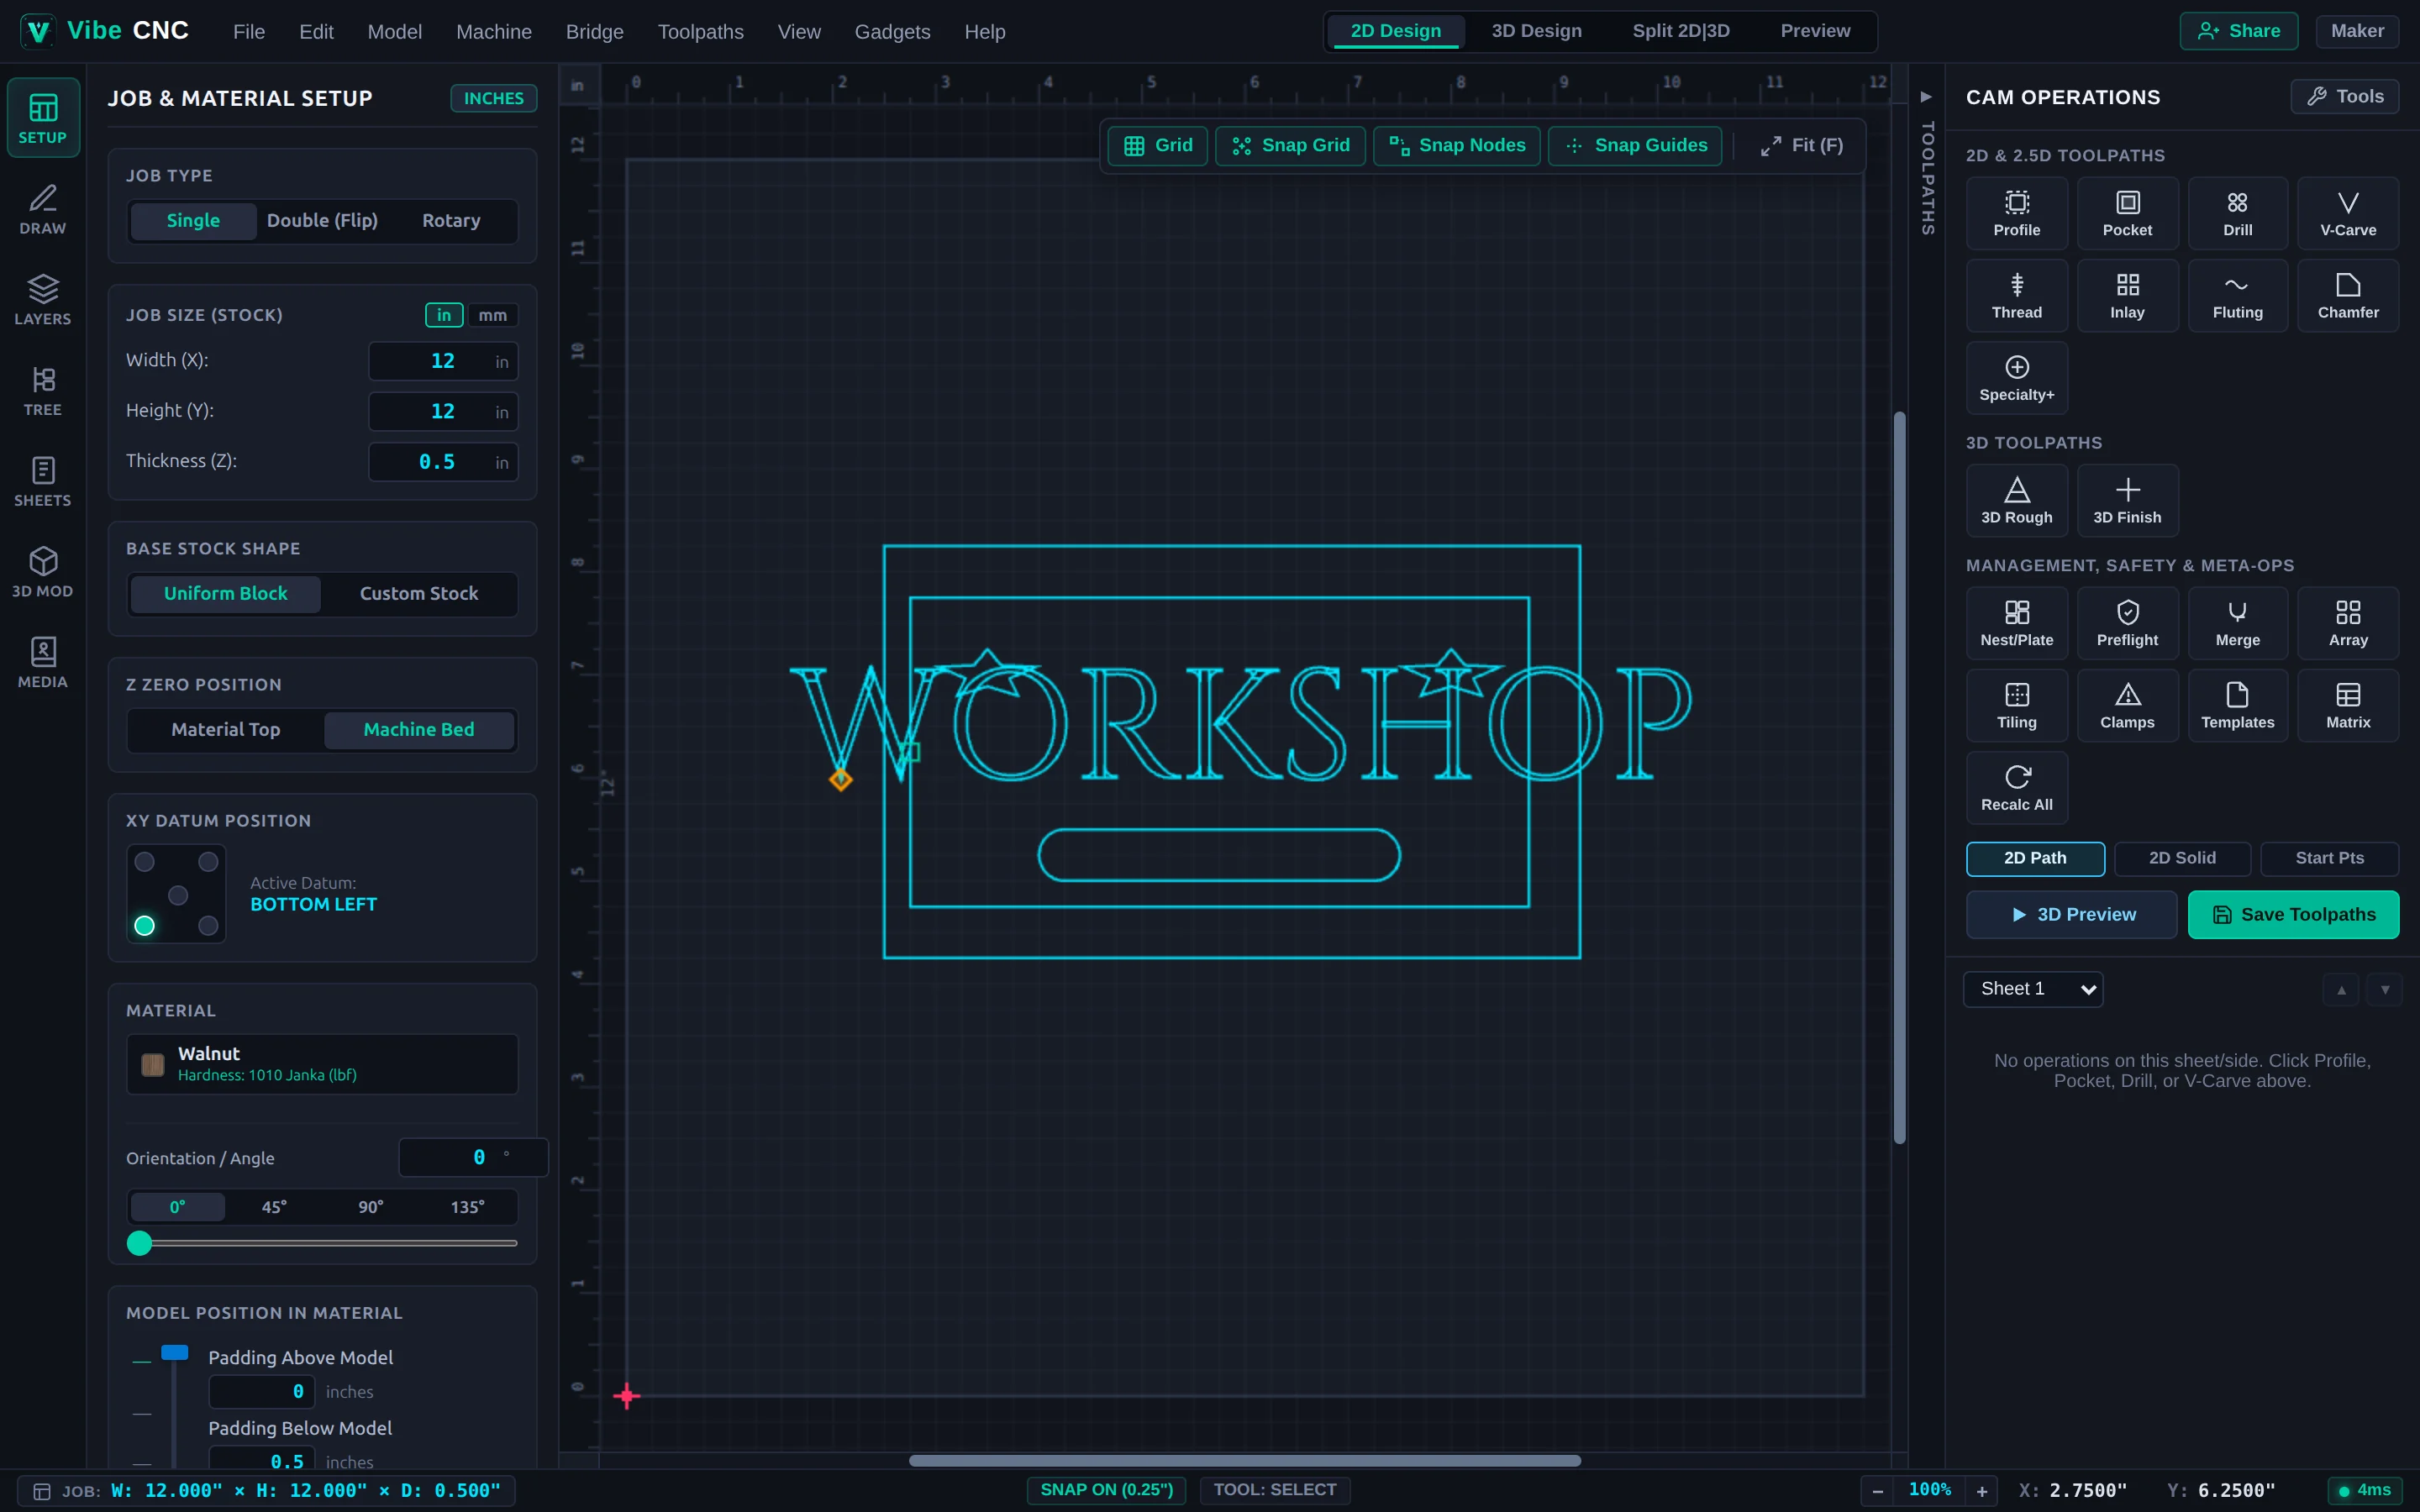
Job Types
- Single-Sided: Standard flat-board routing where all cuts happen from the top face.
- Double-Sided: Projects machined on both faces (such as bowls, trays, or two-sided signs). You choose whether you will flip the stock left-to-right (around X) or top-to-bottom (around Y), and VibeCNC keeps both sides registered.
- Rotary: Cylindrical stock mounted on a 4th-axis rotary attachment. Instead of flat X/Y width and height, you specify cylinder length and diameter.
Dimensions, Units, and Custom Stock
Enter your board's Width (X), Height (Y), and Thickness (Z) in inches or millimeters. Measure your actual stock with digital calipers rather than trusting nominal lumber sizes. A "3/4 inch" plywood sheet often measures 0.718", and a small thickness error can mean cutting into your spoilboard or leaving an uncut onion skin.
If you are machining a live-edge slab or an irregular offcut, switch the stock mode to Custom so your 2D canvas and 3D preview reflect the real outline of the board.
Z-Zero Position: Material Surface vs Machine Bed
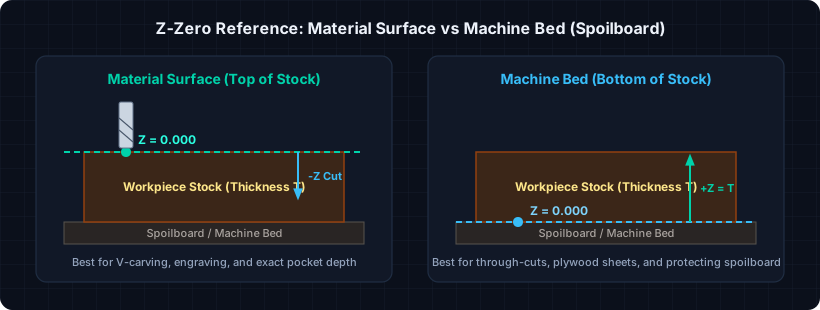
Your Z-zero choice determines where Z = 0.000 sits in your exported G-code. Make sure the setting in VibeCNC matches where you physically touch off your Z-probe at the CNC.
| Z-Zero Option | Best Used For | Why It Matters on the Machine |
|---|---|---|
| Material Surface (Top) | V-carving, inlays, engraving, shallow pockets | Guarantees exact cut depth relative to the top face even if board thickness varies slightly. |
| Machine Bed (Spoilboard) | Cabinet parts, plywood cutouts, profiling all the way through | Prevents accidental deep grooves in your spoilboard when plywood thickness fluctuates between sheets. |
XY Datum Position
Pick one of the five standard datum anchors: Bottom-Left, Center, Top-Left, Top-Right, or Bottom-Right. Bottom-Left is the classic default for fixture fences and corner touch plates. Center is ideal when working with round blanks, live-edge slabs, or two-sided pieces where centering on the blank matters more than referencing an edge.
If you change Z-zero or XY datum after creating toolpaths, always click Recalc All in the Right Drawer before saving G-code so every path uses the updated origin.