
Project Walkthrough
Precision V-Carve End-Grain Inlay
Carve gap-free contrasting hardwood inlays for cutting boards and keepsake boxes using VibeCNC's V-Carve Inlay workflow.
Traditional flat inlays are notoriously unforgiving because any tiny deflection leaves a visible dark glue line. A V-Carve Inlay solves that problem by carving both the female pocket and an inverted male plug with the exact same V-bit angle. When you clamp them together, the tapered walls wedge tight like a cork in a bottle, closing seams completely.
Step 1: Prepare High-Contrast Vectors
- Set up your base board (for example, a
14" x 10" x 1.25"walnut cutting board) with Z-Zero at Material Surface. - Create or import bold, clean closed vectors (such as a monogram, mountain silhouette, or compass rose). Avoid hair-thin lines under 0.05" wide, as delicate maple slivers can snap during clamping.
- Run Vector Doctor to confirm zero self-intersections or open loops.
Step 2: Configure the V-Carve Inlay Toolpaths
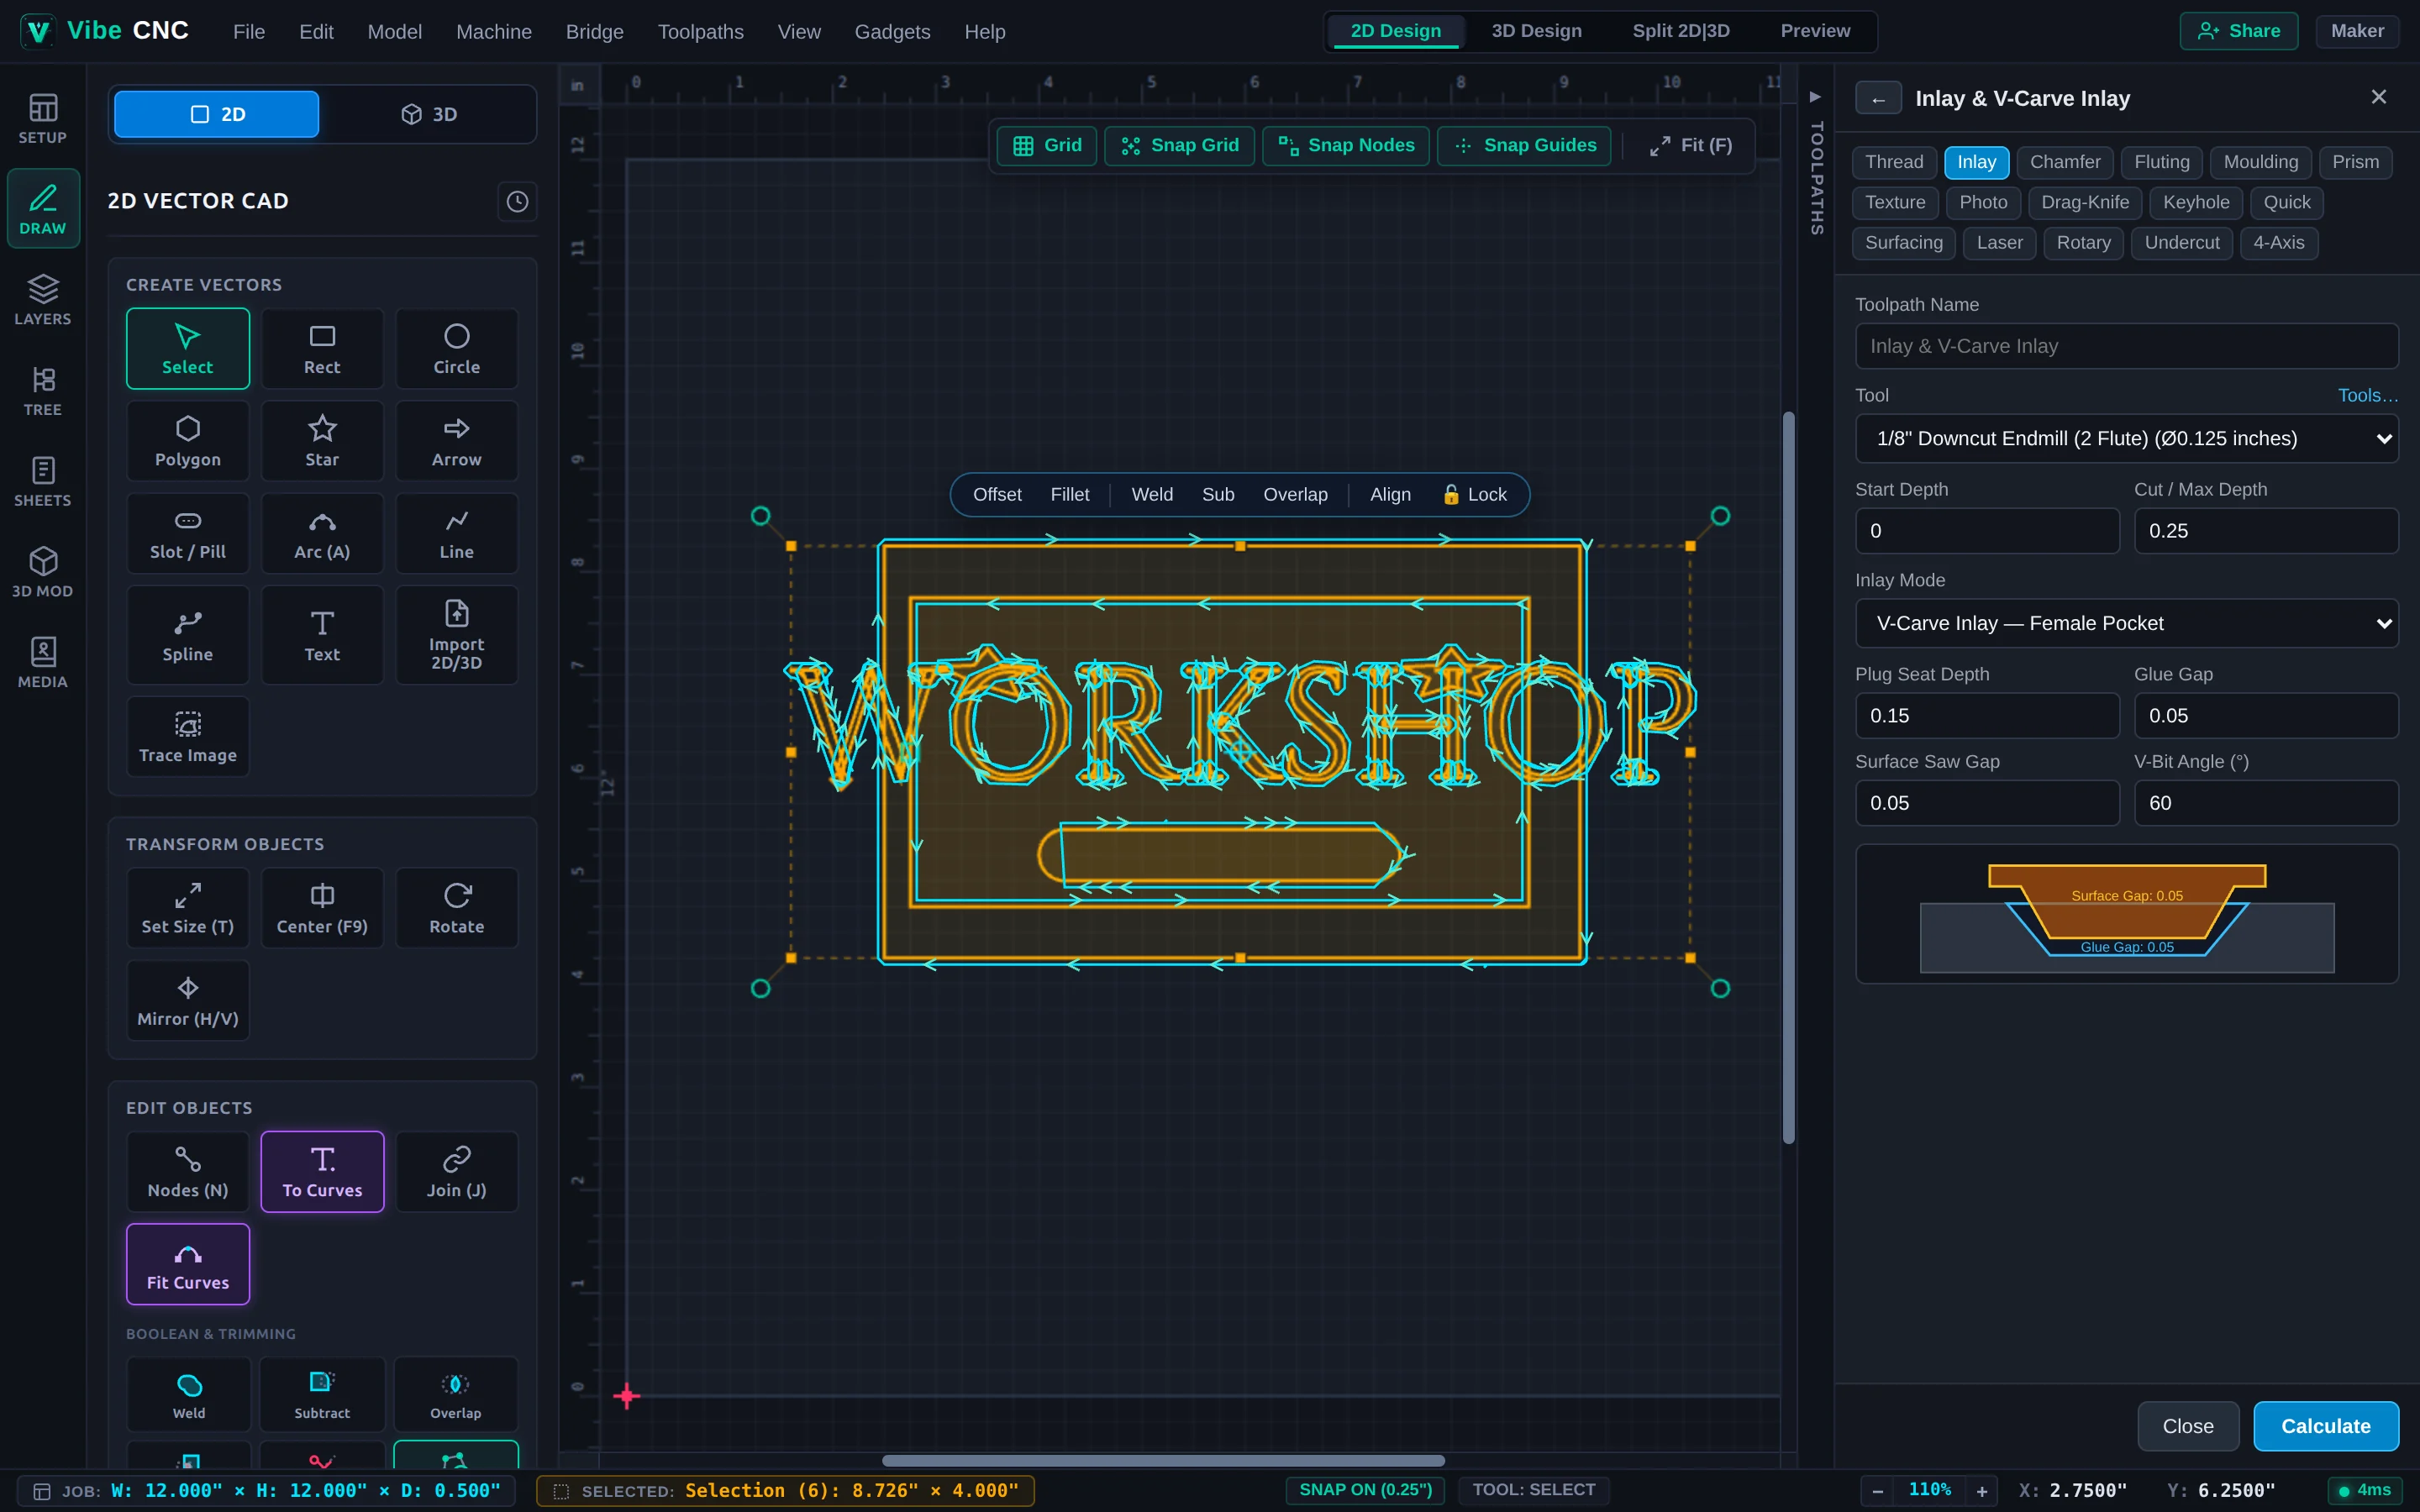
- Select your inlay vectors and click Inlay in the Right Drawer.
- Choose V-Carve Inlay mode and select a sharp 60-degree V-bit (a 30-degree engraving bit works even better for intricate fine details) plus a 1/8" Downcut End Mill for flat-area clearance.
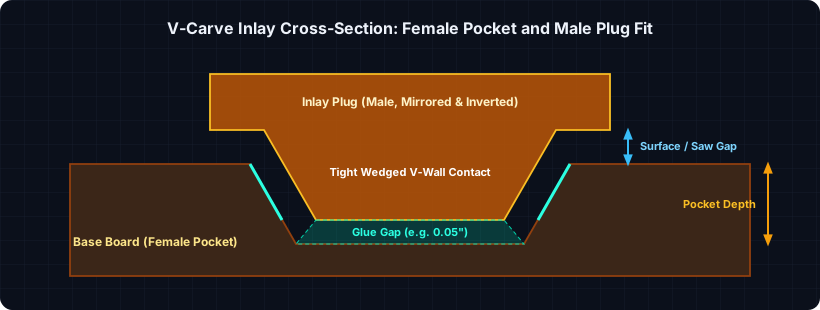
- Dial in the proven starter depths shown in the live cross-section diagram:
- Female Pocket Depth:
0.20" - Male Plug Start Depth:
0.15"(gives 0.15" of deep wedged inlay engagement plus a0.05"glue gap at the bottom) - Male Plug Flat Depth:
0.10"(leaves a0.10"surface gap above the walnut board so your bandsaw or flush-trim blade has room to slice off the plug backing)
- Female Pocket Depth:
Step 3: Machine the Female Pocket & Mirrored Male Plug
- Generate the Female Pocket toolpath on your walnut base board.
- Switch to a second sheet (for example,
0.75"thick hard maple) for the Male Plug. VibeCNC mirrors the plug vectors automatically and adds an outer boundary box so the V-bit carves away the background around the raised maple design. - Preview both sheets in 3D Preview to verify that the plug looks like an exact mirror image of the pocket.
Step 4: Glue, Clamp & Flush Trim
- Brush wood glue thoroughly over every angled wall of both the walnut pocket and the maple plug.
- Invert the maple plug into the pocket and clamp firmly overnight.
- Once cured, saw off most of the maple backing block through the 0.10" surface gap, then flatten the final skin with a drum sander, planer, or a quick CNC surfacing pass to reveal crisp, seamless joinery.